For most biological samples, a fluorescent marker is required to use the confocal microscope's capabilities.
Generally, if you've successfully stained your samples and viewed the results under an ordinary epi-fluorescence microscope, your samples will be suitable for confocal.
Confocal microscopy capabilities
A confocal laser scanning microscope removes out-of-focus blur. Samples need to be either fluorescent or reflective. Most biological samples are naturally fluorescent (auto-fluorescent) or have artificial fluorescence added to specific regions to make them visible.
Material sciences often have reflective substances to investigate.
A useful example to understand confocal, is when you photograph a person's head. You might notice the trees in the background are blurred, as are features in front of the person. This is because the person's head lies in the focal plane. Objects in front or behind the focal plane gradually go more and more out of focus. Exactly the same thing happens in a microscope slide.
Histologists section material to around 4µm thick, because when it's this thin most of the specimen will lie within the focal plane – and therefore be in focus from top to bottom. However, go to say a 60× objective and you'll notice there is a perceptible depth to the section as regions go in and out of focus. Consequently, to obtain a sharp image under conventional (wide-field) light microscopy anything thicker than about 4µm becomes too blurry to be useful. It's not that there isn't a sharp plane of focus lurking in there, it's just obscured by too much out of focus information. To utilise the 'third dimension' or z axis of a sample then requires either many serial sections – or a confocal.
Optical sectioning
By eliminating everything which is out of focus, the confocal microscope takes an 'optical section' through a sample. Going back to the photography analogy, only the person's face would be visible, the trees in the background and objects in front would be black.
Moving the point of focus up and down moves the optical section through the sample, a so called 'z series' because it moves along the z axis.
The confocal microscope control panel
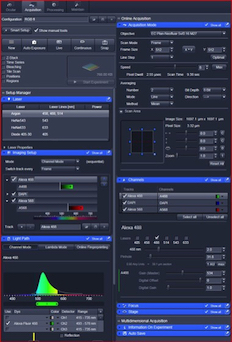 The control panel of the Zeiss LSM 710 confocal may look intimidating, but you'll probably only need to become familiar with a small proportion of the components.
The main thing to decide is which laser(s) you'll need to excite your fluorescent sample. It's important to remember that the confocal is essentially just another form of fluorescence microscope. Before going anywhere near it, check your labelling works by using a conventional fluorescence microscope. If your procedure doesn't work under those conditions, it's unlikely to work on the confocal. Doing this simple test will save you a lot of time – and cost.
Lasers are intense, but excite over a very narrow range compared to conventional mercury burner light sources. You should therefore check the excitation curve of your fluorophore to ensure it will be excited enough. Most excitation curves are bell shaped, you don't have to hit the maximum peak, but excitation efficiency drops away as you move down the shoulders of the curve.
On the Zeiss 710 the emission detection ranges can be customised to suit the fluorophore you're using. Just adjust the slider to suit.
Importance of control samples
Due to the large amount of control you have in the confocal software to adjust intensity, background, etc, it's very important to have good control samples. All the signal reaching the detectors is coloured with the appropriate false color, e.g. FITC signal is coloured green. Consequently, any auto-fluorescence or stray signal from another fluorophore will be coloured exactly the same as legitimate signal. These subtle effects can often be seen down the eyepiece of the microscope as shifts in hue, something the confocal will not show you!
Test the inherent fluorescent property of your sample with control slides with no markers. if you are using more than one fluorophore make a slide with each of the markers. These are then examined with the 'wrong' detector, to see if they might contribute any unexpected signal to that channel.
You can expect some 'bleed through', this is a manageable problem. Having determined the level of a background signal, the background settings are adjusted accordingly and it's eliminated from the final image. If you have a good signal to noise ratio to begin with, little effect will be seen in your image, and you can be confident in the results.